git

1. Git 概述
Git 是一个免费开源的分布式版本控制系统,可以快速高效地处理从小到大的各种项目。
Git 具有廉价的本地库(本地库在本地磁盘上)、方便的暂存区和对各工作流分支等特性。
1.1 版本控制
1.1.1 什么是版本控制
可以记录文件修改的历史记录,从而允许用户查看历史版本
1.1.2 为什么需要版本控制
个人开发过渡到团队协作
1.1.3 版本控制工具
集中式版本控制工具
CSV、SVN、VSS……
都有一个单一的集中管理的服务器,保存所有文件的修订版本,协同工作的人通过客户端连接到服务器。缺点是中央服务器的单点故障。

分布式版本控制工具
Git、Mercurial、Bazaar、Darcs……
例如 Git,客户端是把代码仓库完整地镜像到本地库。保证了如果协同工作用的任意一处文件发生故障,事后都可以用其他客户端的本地仓库进行恢复。因为客户端的每一次文件提取操作,实际上都是一次对整个文件仓库的完整备份。
分布式的版本控制系统出现之后,解决了集中式版本控制系统的缺陷:
① 服务器断网的情况下也可以进行开发(因为版本控制是在本地进行的)
② 每个客户端保存的也都是整个完整的项目(包含历史记录,更加安全)

1.2 工作机制
工作区是指代码存放的磁盘的目录位置,不同于开发工具(IDEA 等)
代码从工作区添加(add)到暂存区后提交(commit)到本地库,本地库一旦提交则会生成历史版本从而不能单独删除。新版本基于历史版本,因此无法单独删除。

1.3 Git 和代码托管中心
代码托管中心:基于网络服务器的远程代码仓库,简单称为远程库。
局域网:GitLab
互联网:GitHub、Gittee
2. Git 常用命令
| 作用 | 命令 |
|---|---|
| 初始化本地库 | git init |
| 查看本地库 | git status |
| 添加暂存区 | git add |
| 提交本地库 | git commit -m |
| 版本穿梭 | git reset –hard 版本号 |
2.1 初始化本地库
git init

2.2 查看本地库状态
1 | git status |

2.3 添加暂存区
1 | git add |
添加暂存区实际就是 git 追踪文件的过程,提交到暂存区后文件并未形成历史版本,且可以使用 git rm –cached 命令删除暂存区文件。步骤如下:
在本地库编写名为 hello.txt 文件

查看本地库状态

添加到暂存区

再次查看本地库状态,发现文件名变绿

删除暂存区文件,再次查看本地库文件,发现文件名变回红色

2.4 提交本地库
1 | git commit -m |

查看版本号:
git reflog(精简版本号)

git log(查看详细日志,可查看完整版本号)

2.5 修改文件
使用 vim 编辑器修改文件

提交本地库

查看版本信息

注:提示 1 insertion(+),1 deletion(-)原因:
Git 按照行维护文件,因此先删去原始行再进行重新添加
2.6 版本穿梭
1 | git reset --hard 版本号 |
版本穿梭到 first 版本

版本穿梭后查看 master 文件,指针指向第一个版本

注:
版本穿梭可以向前,也可以向后
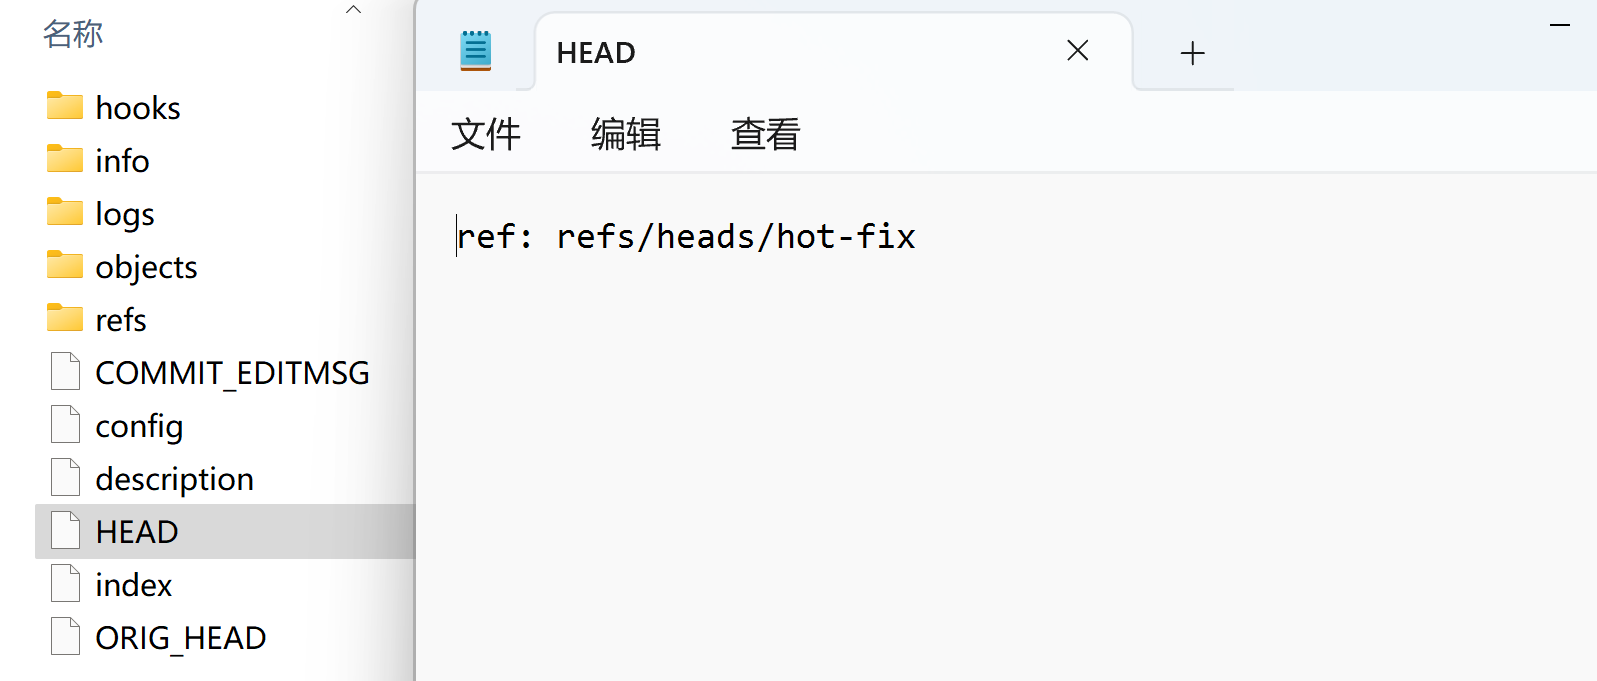
本次库内存中记录版本信息,Git 切换版本,底层是移动 HEAD 指针,通过调用指针指向不同版本
3. Git 分支操作
3.1 分支概述
3.1.1 什么是分支
在版本控制过程中,同时推进多个任务,为每个任务,我们就可以创建每个任务的单独分支。
- 使用分支意味着程序员可以把自己的工作从开发主线上分离开来,开发自己分支的时候,不会影响主线分支的运行。
- 对于初学者而言,分支可以简单理解为副本,一个分支就是一个单独的副本。(分支底层其实也是指针的引用)
3.1.2 使用分支的好处
- 同时并行推进多个功能开发,提高开发效率。
- 各个分支在开发过程中,如果某一个分支开发失败,不会对其他分支有任何影响。失败的分支删除重新开始即可。
3.2 分支的操作
| 作用 | 命令 |
|---|---|
| 创建分支 | git branch 分支名 |
| 查看分支 | git branch -v |
| 切换分支 | git checkout 分支名 |
| 指定分支合并到当前分支 | git merge 分支名 |
3.2.1 创建、查看、修改与切换
创建分支 hot-fix,并查看分支

修改分支到 hot-fix 上


查看当前文件版本

3.2.2 合并分支
正常合并

冲突合并
1.冲突产生原因
合并分支时,两个分支在同一个文件的同一个位置有两套完全不同的修改。需要人为决定新代码的内容。
–> 在 master 分支下修改 hello.txt 并提交本地库

–>在 hot-fix 分支下修改 hello.txt 并提交
–>分支合并

–>查看当前文件

2.解决冲突
–>修改文件为想要的内容

–>提交至本地库

–>查看 hot-fix 下文件,发现内容无变化,说明合并文件只修改当前分支下文件

4. GitHub 操作
4.1 创建远程仓库别名
查看当前所有远程地址别名
1
git remote -v

创建远程仓库别名
1
git remote add 别名 远程地址

4.2 推送本地库到远程库
修改 hello.txt 文件并提交到本地库

推送到远程库

查看远程库

4.3 拉取远程库到本地库
在远程库修改文件并提交

拉取远程库到本地库

查看本地库状态

查看本地库文件 hello.txt

4.4 克隆远程库到本地
新建文件夹并进入 Git Bash
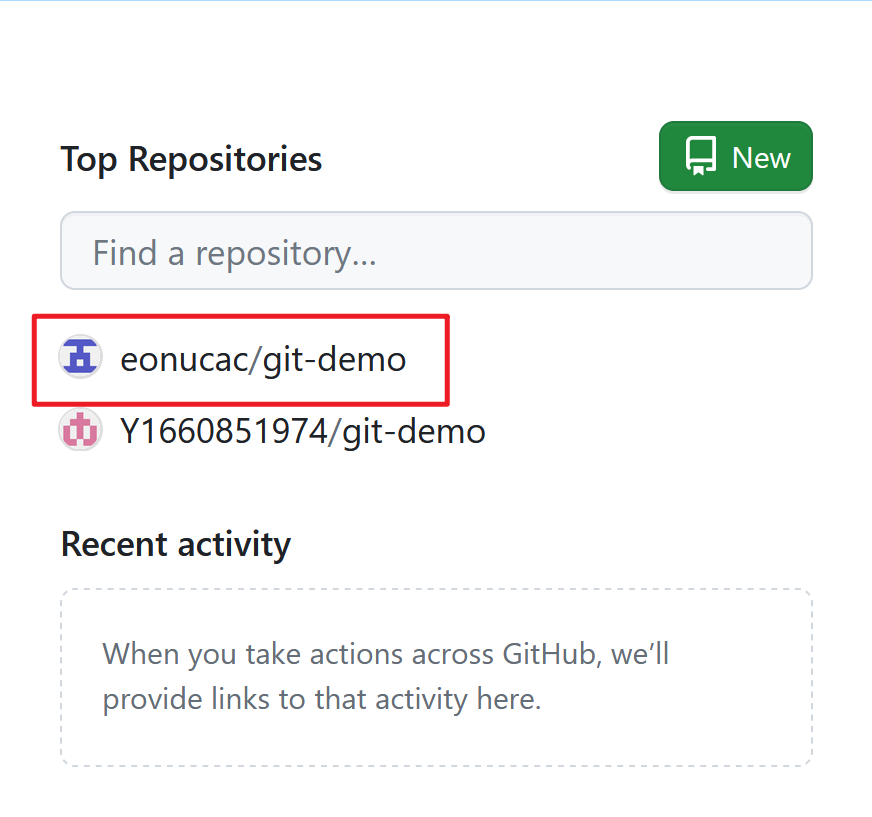
查看 Windows 凭据。由于 Windows 只能同时记住一个账号,因此删掉 eonucac 账号

克隆远程库

注:git-demo 为公共库,公共库的读权限没有限制,因此克隆时无需登录
查看本地文件变化

查看远程仓库别名

**小结:**clone 时会做以下操作。1.拉取代码;2.初始化本地库;3.创建别名
4.5 团队内协作
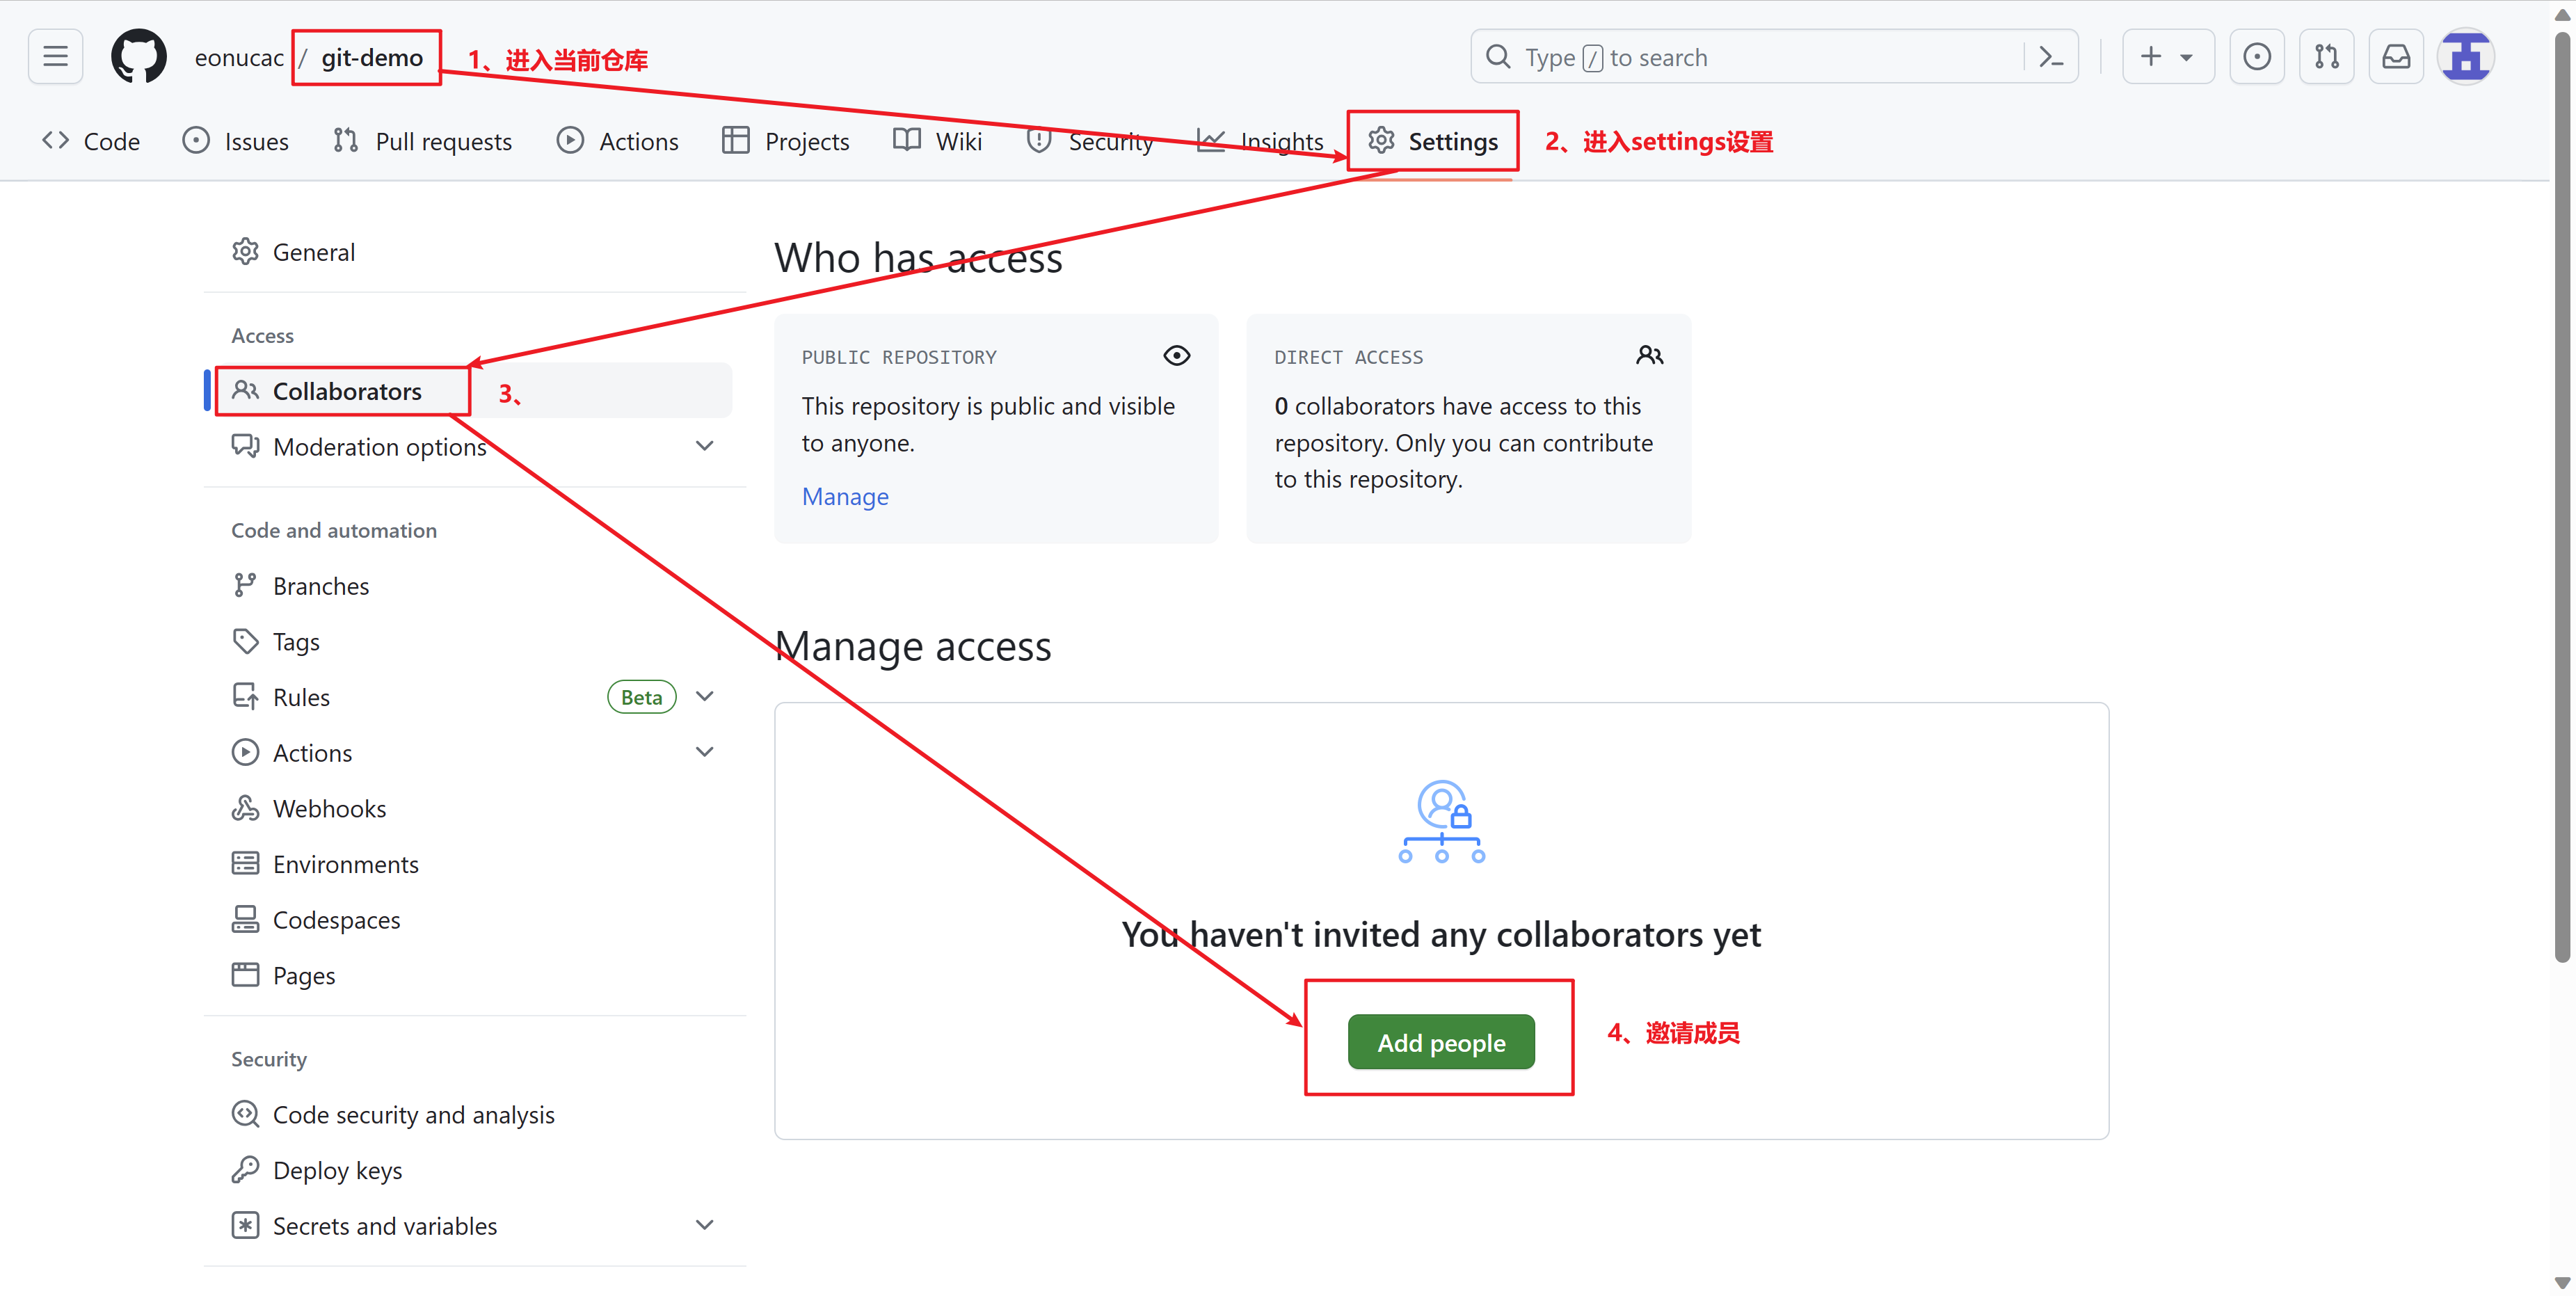
@eonu 邀请团队成员@1

@eonu 复制邀请函

@1 粘贴邀请函到浏览器,同意协作邀请

@1 查看协作库

@1 重新推送本地库到远程库后,@eonu 查看文件 hello.txt,发现为@1 修改后版本
4.6 跨团队协作
搜索需要的文件,插入自己的库


@1 修改文件 hello.txt 同步到@eonu


@eonu 查看 y-git-demo

@eonu 合并申请代码

确认合并后查看


4.7 SSH 免密登录
4.7.1 生成 SSH 密钥文件
C 盘用户目录下进入 Git Bash Here
生成 SSH 密钥文件 ssh-keygen


生成.ssh 文件夹

查看公钥

4.7.2 添加公钥
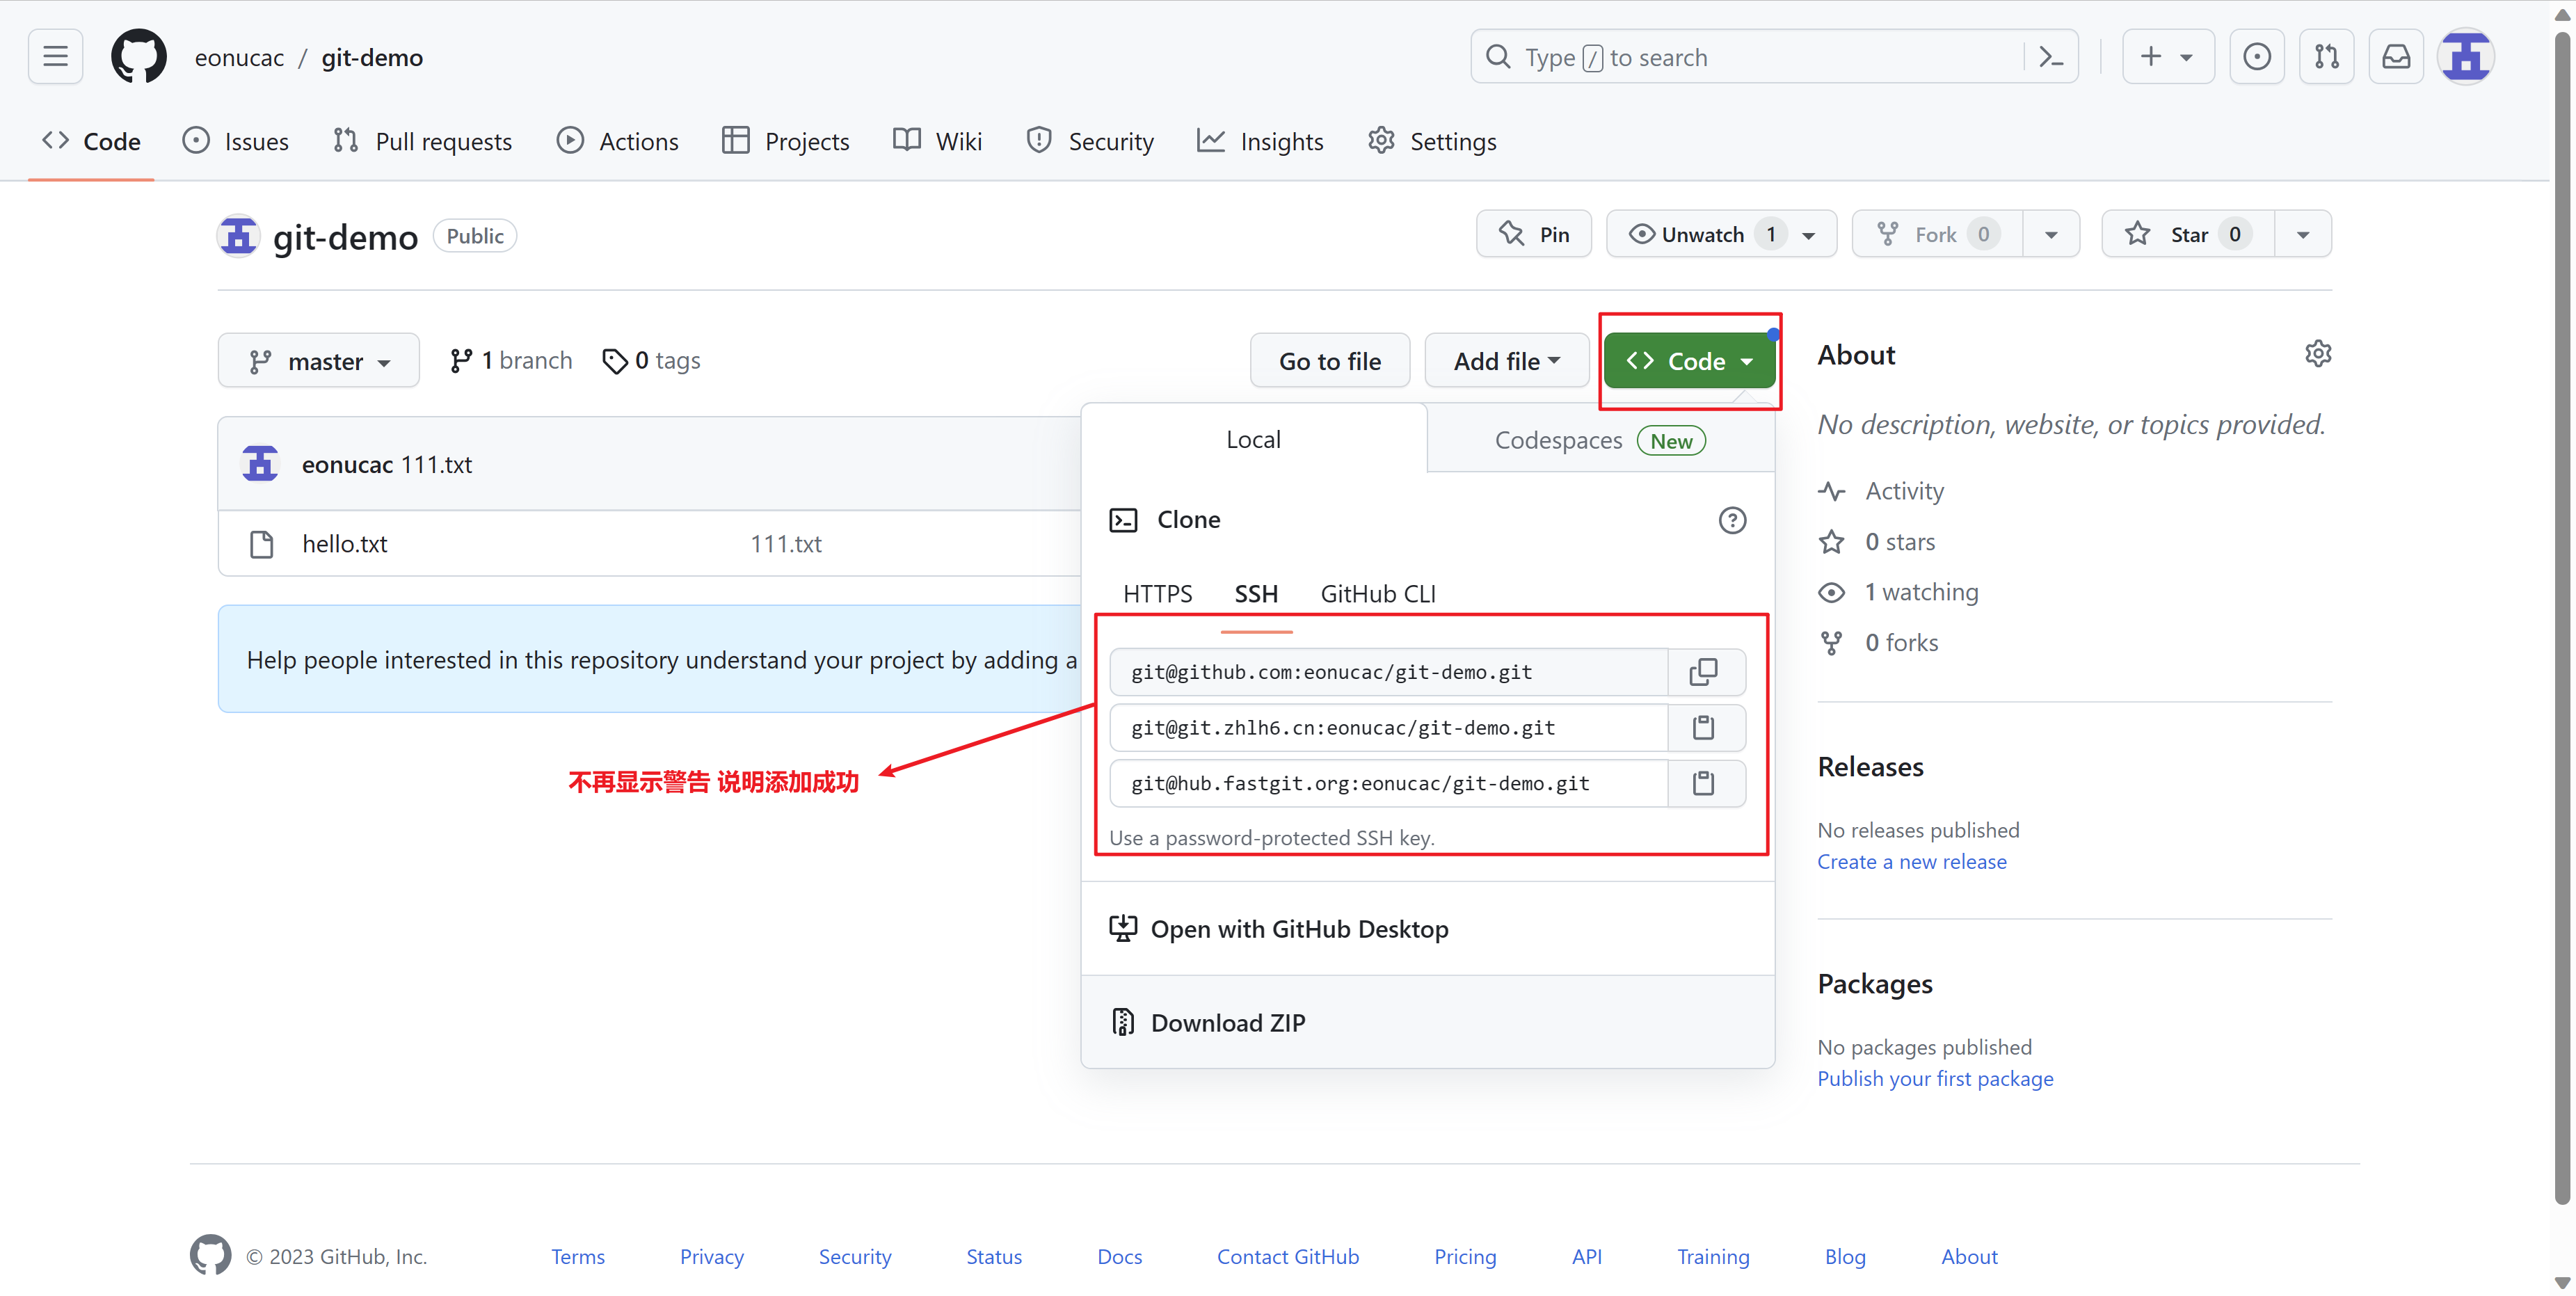
将公钥添加到 GitHub 中@eonu 账号(对应公钥最后邮箱)


4.7.3 公钥添加测试
测试公钥是否添加成功


测试免密登录
–>拉取测试

–>推送测试

–>验证推送测试

5. IDEA 集成 Git
5.1 配置 Git 忽略文件
5.1.1 忽略原因
与项目的实际功能无关,不参与服务器上部署运行,忽略后可以屏蔽 IDE 工具之间从差异
5.1.2 配置文件
在 C 盘用户目录下创建忽略规则文件 xxxx.ignore
编辑文件内容
1
2
3
4
5
6
7
8
9
10
11
12
13
14
15
16
17
18
19
20
21
22
23
24
25
26
27# Compiled class file
*.class
# Log file
*.log
# BlueJ files
*.ctxt
# Mobile Tools for Java (J2ME)
.mtj.tmp/# Package Files #
*.jar
*.war
*.nar
*.ear
*.zip
*.tar.gz
*.rar
hs_err_pid*
.classpath
.project
.settings
target
.idea
*.iml在.gitconfig 文件中引用忽略配置文件
1
2
3
4
5
6
[user]
name = eonucac
email = 2483917248@qq.com
[core]
excludesfile = C:/Users/Eon-ucac/git.ignore
#使用“正斜线(/)”
5.2 定位 Git 程序

5.3 初始化、添加与提交
创建本地库

将 pom 文件添加到暂存区

编写 GitTest.java 文件
–>自动添加至暂存区

注:文件是否提交不影响文件正常运行
–>提交目录

–>提交至本地库

注:提交后文件名变黑,说明无需提交
5.4 切换版本
5.4.0 修改文件

5.4.1 查看版本信息

5.4.2 切换版本
在希望切换版本下右键切换版本,版本切换可以向前也可以向后

5.5 创建、切换分支
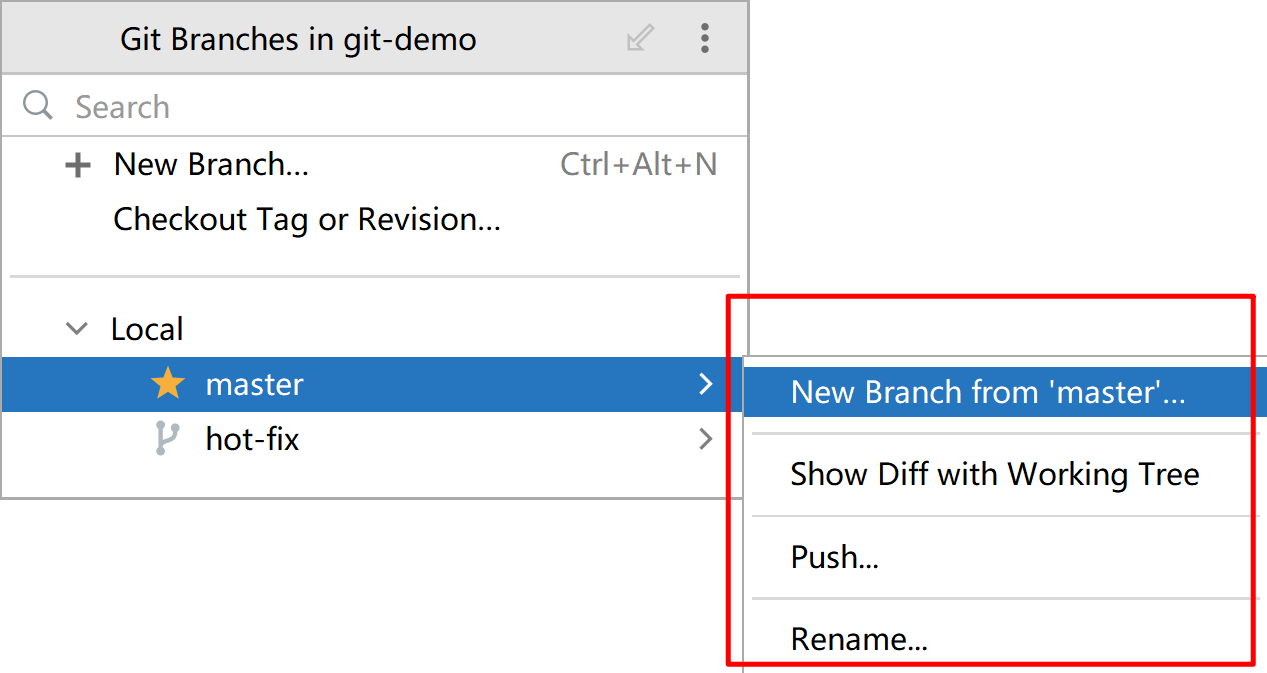
5.5.1 创建分支
方法一

方法二

5.5.2 切换分支
创建时自动切换

注:切换后右下角状态栏,分支显示为:hot-fix
手动切换

验证当前处于哪一分支
–>查看右下角状态栏
–>根据分支功能
–>当前所处分支

–>其他分支

5.6 合并分支
5.6.1 正常合并
查看 master 分支下文件
1
2
3
4
public static void main(String[] args) {
System.out.println("hello,git!");
System.out.println("hello,git2!");
}查看 hot-fix 分支下文件
1
2
3
4
5
public static void main(String[] args) {
System.out.println("hello,git!");
System.out.println("hello,git2!");
System.out.println("hello,git4!");
}将 hot-fix 分支下文件合并到 master 分支

合并后 master 分支下文件代码
1
2
3
4
5
public static void main(String[] args) {
System.out.println("hello,git!");
System.out.println("hello,git2!");
System.out.println("hello,git4!");
}
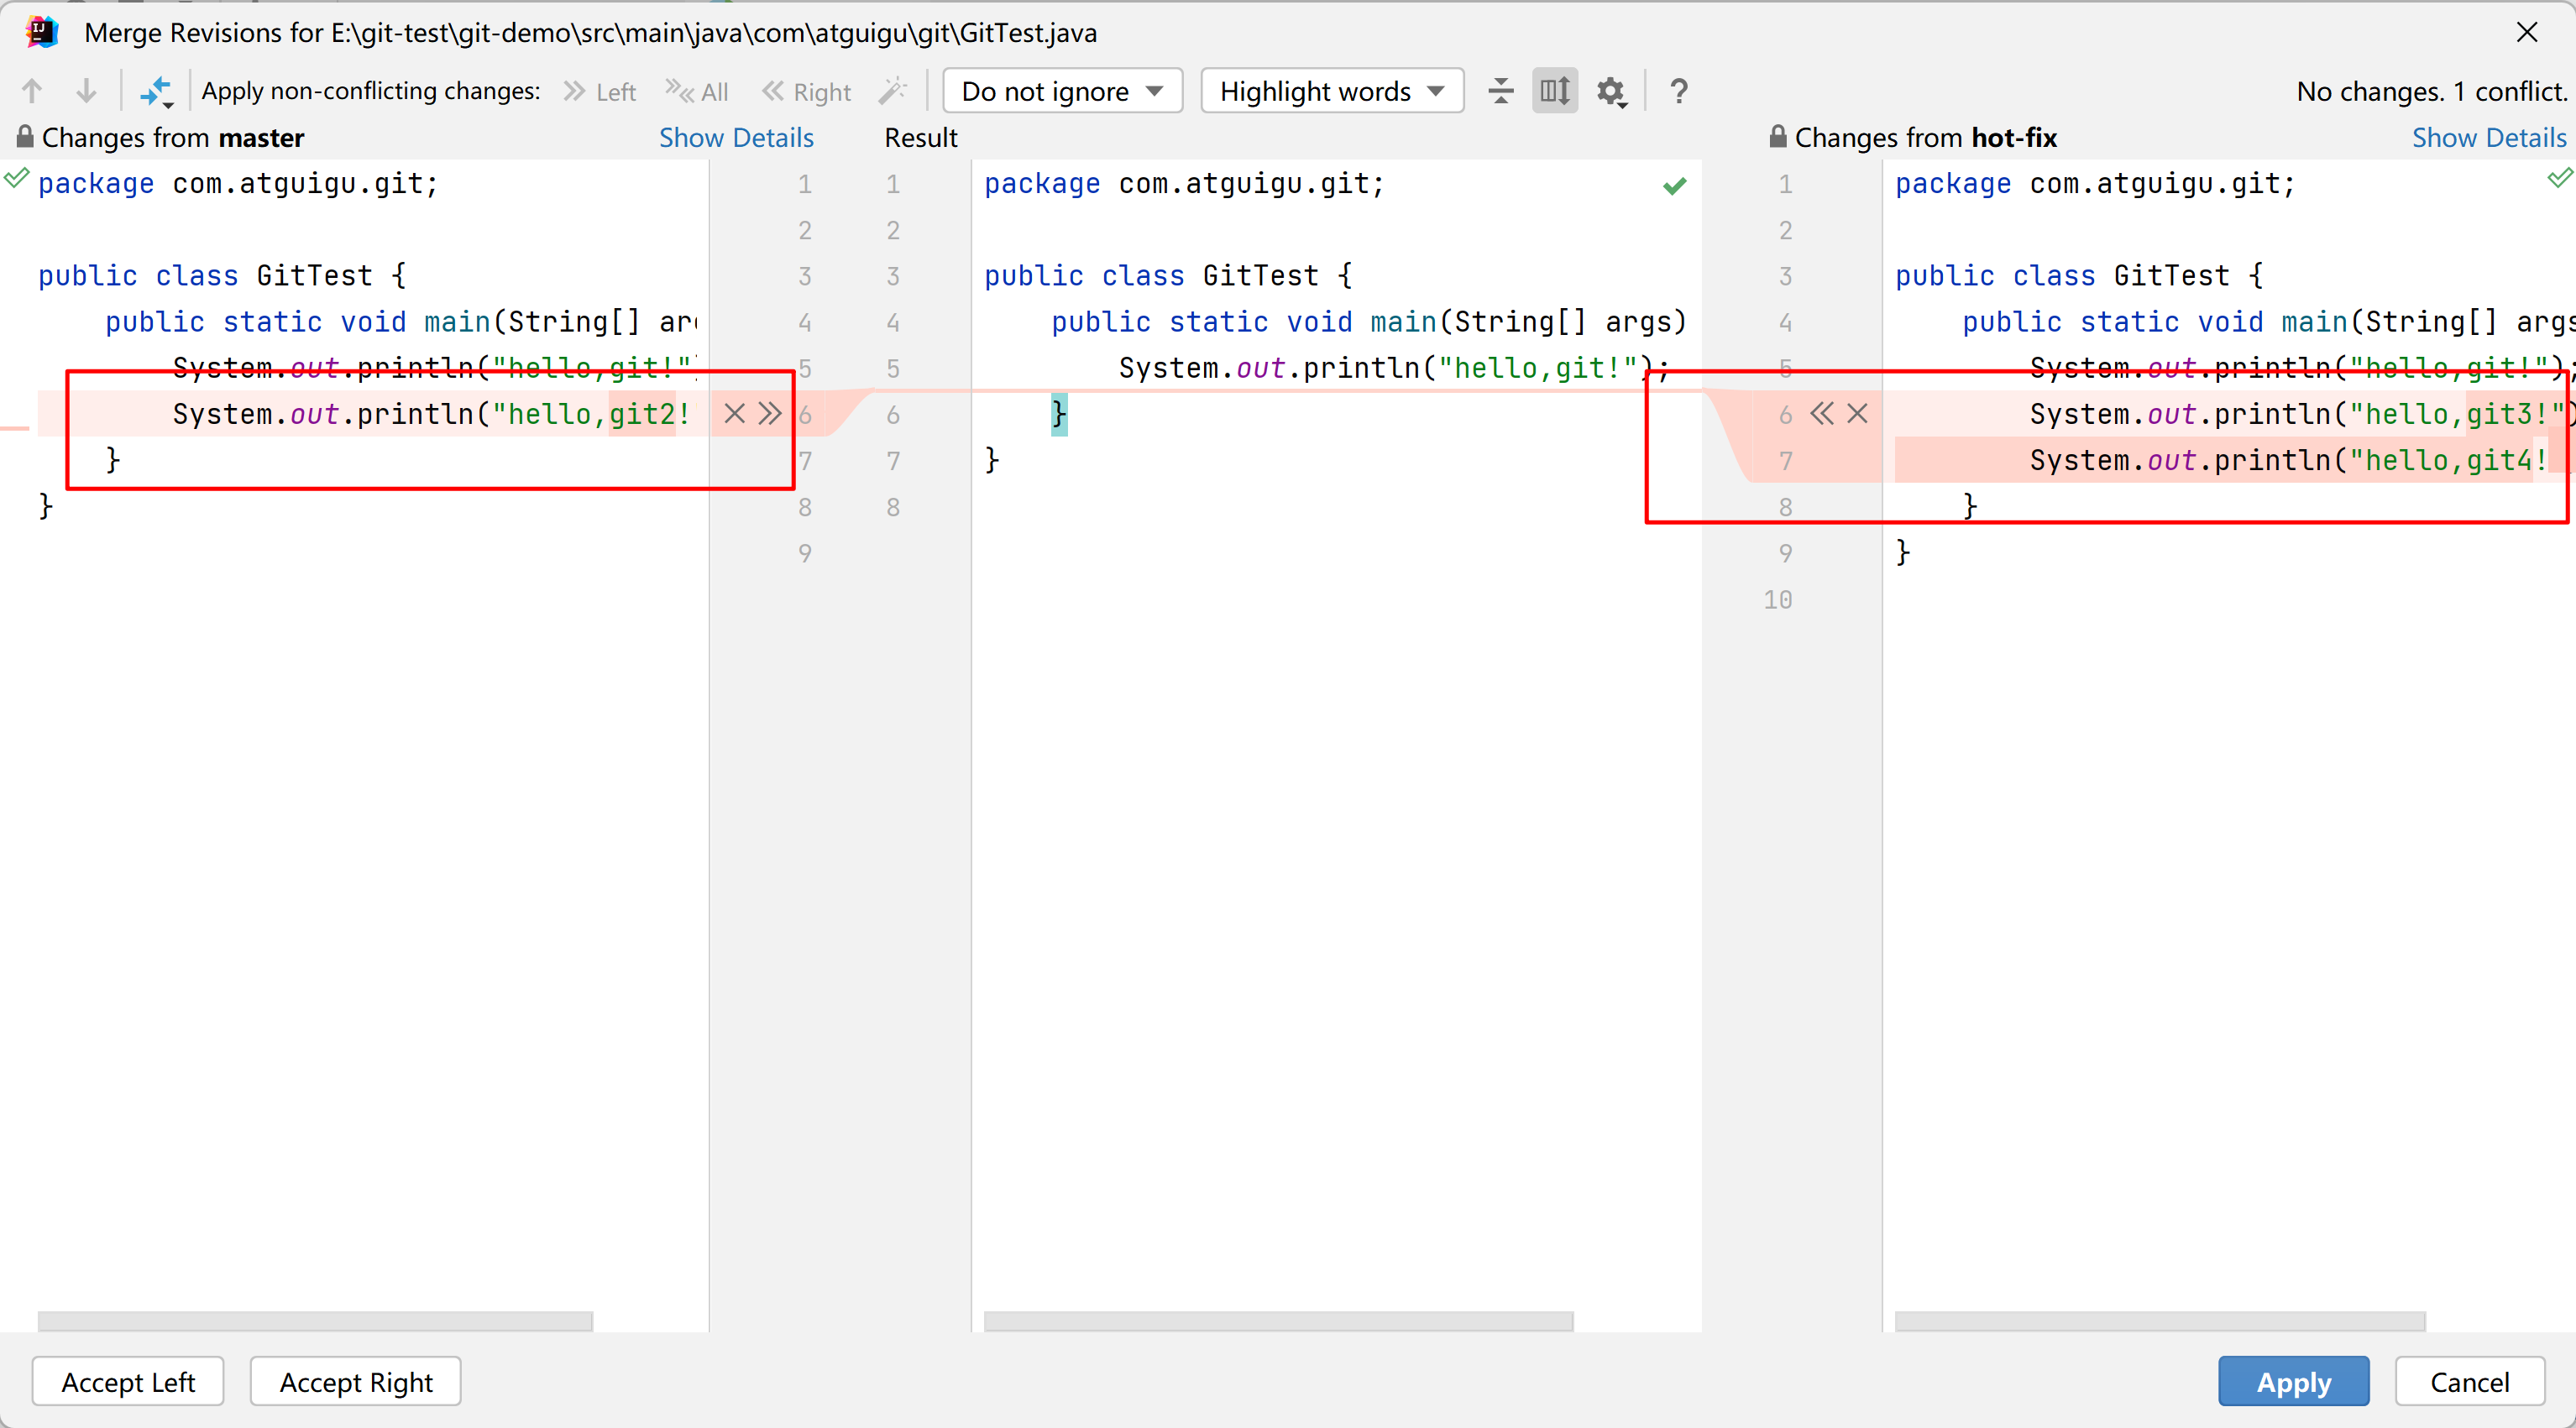
5.6.2 冲突合并
查看 master 分支下文件
1
2
3
4
public static void main(String[] args) {
System.out.println("hello,git!");
System.out.println("hello,git2!");
}查看 hot-fix 分支下文件
1
2
3
4
5
public static void main(String[] args) {
System.out.println("hello,git!");
System.out.println("hello,git3!");
System.out.println("hello,git4!");
}将 hot-fix 分支下文件合并到 master 分支
手动合并


重新提交至本地库
查看日志

6. IDEA 集成 GitHub
6.1 设置 GitHub 账号
6.1.1 通过网页跳转授权登录(较慢)

6.1.2 通过口令登录
获取口令


复制口令(刷新后不再显示,最好保存)
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

将口令粘贴至 IDEA 中登录账号

6.2 分享项目到 GitHub


6.3 推送代码到远程库
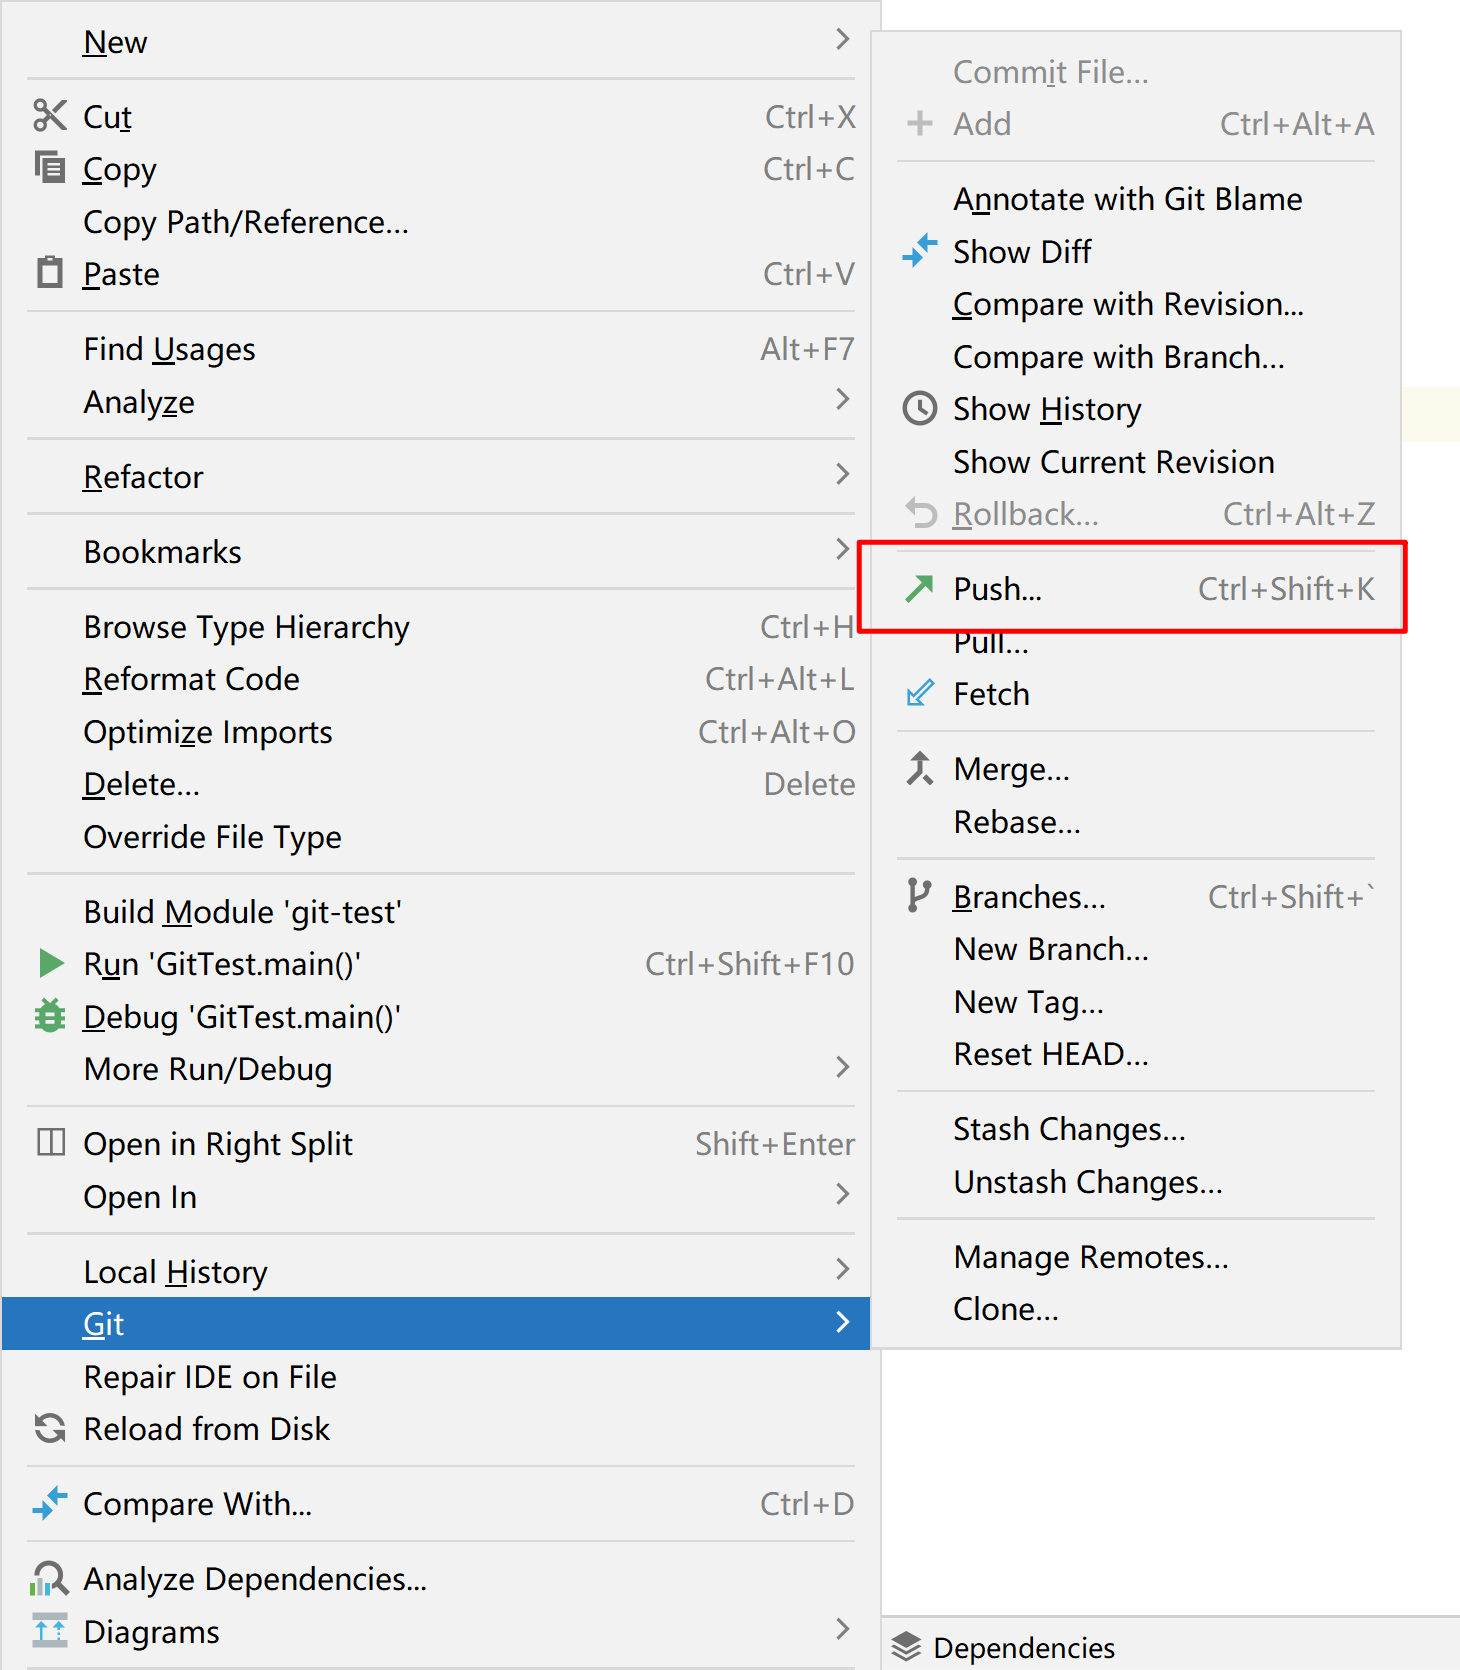
6.3.1 推送方法
方法一

方法二

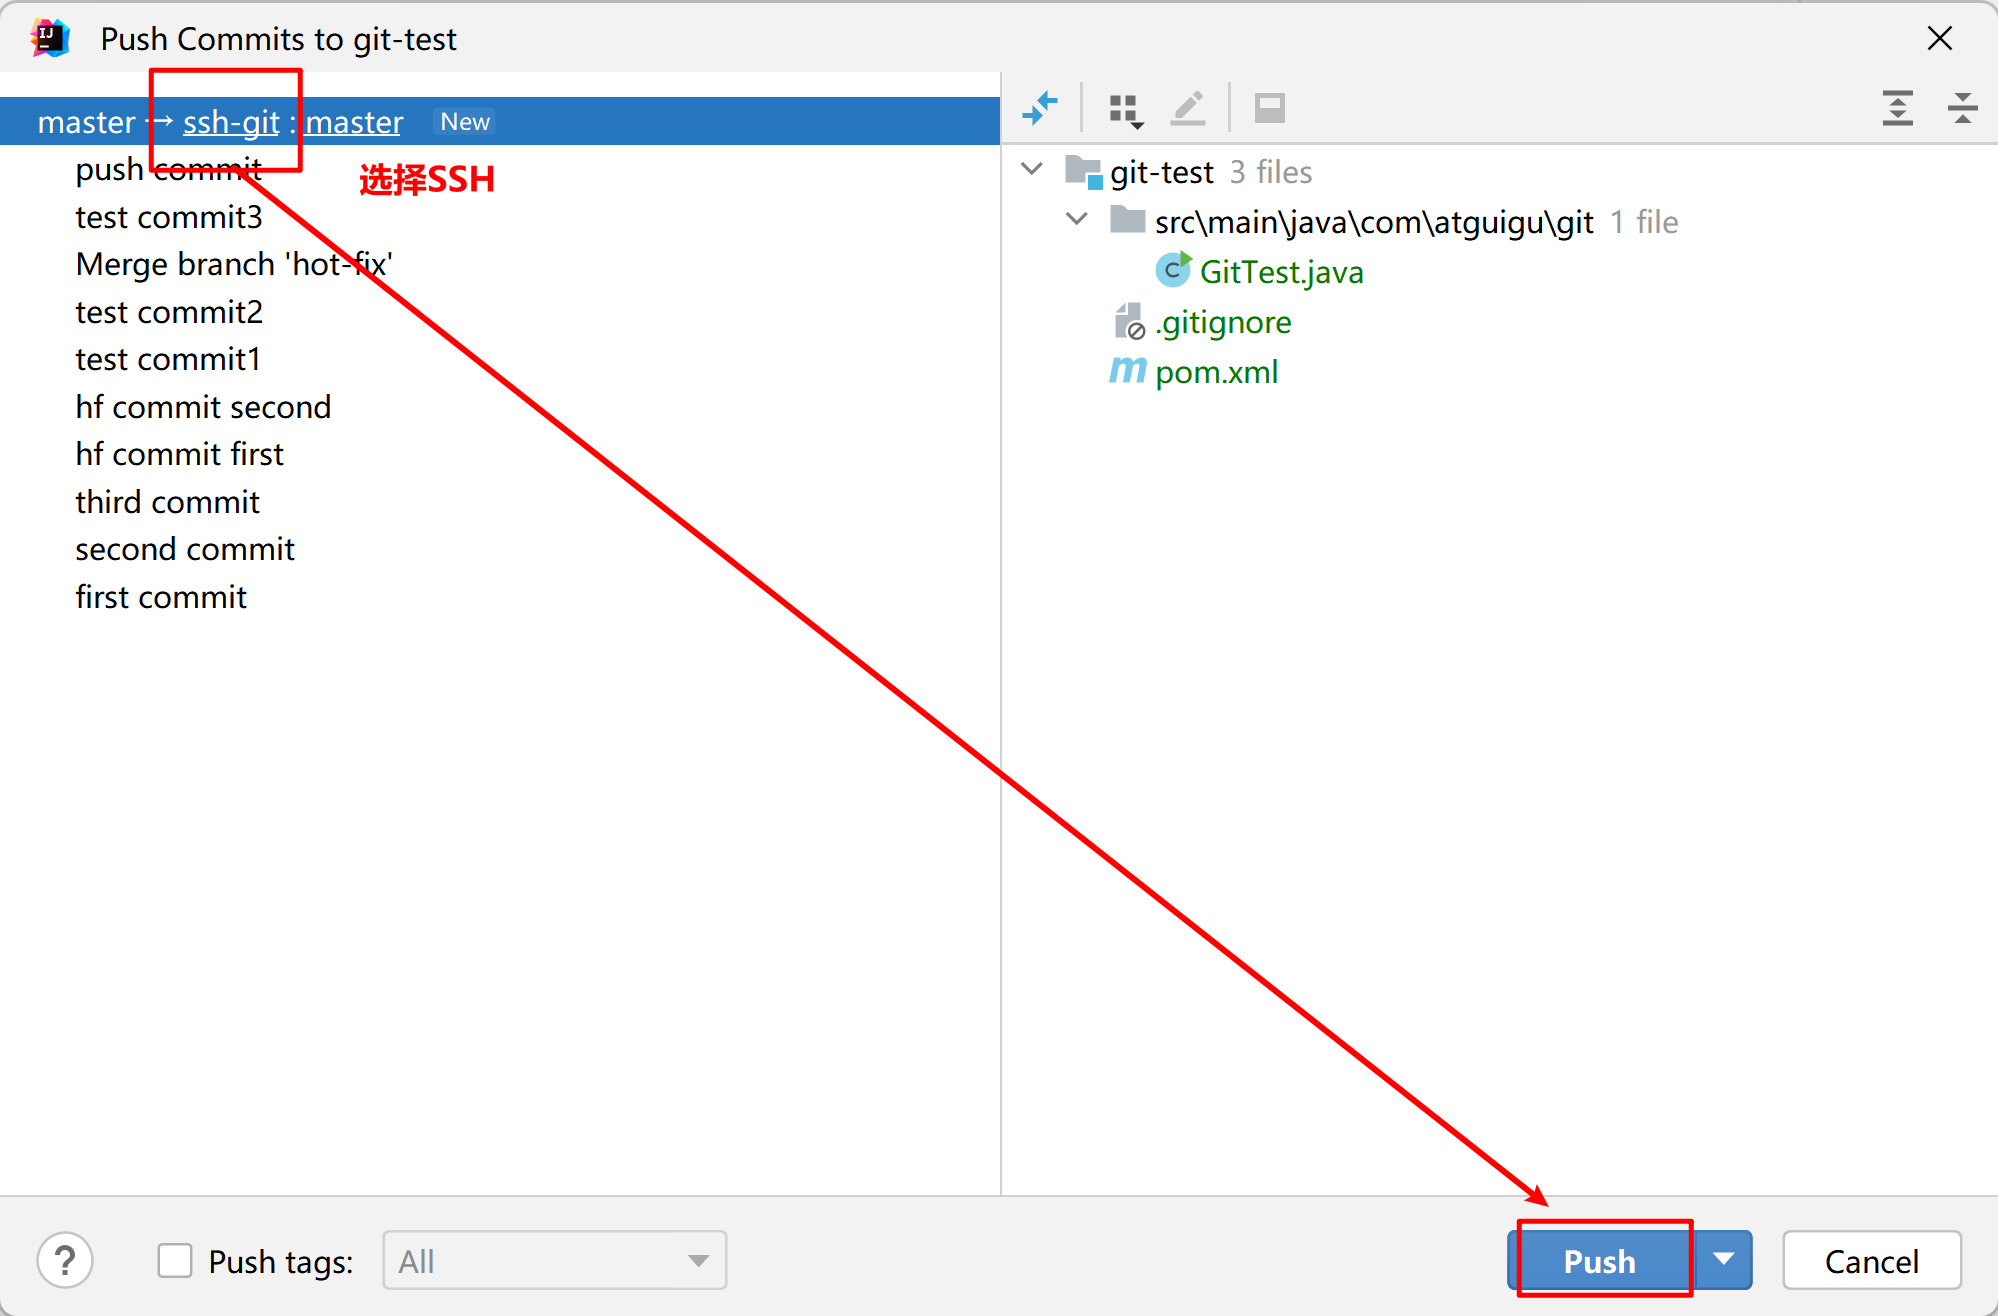
6.3.2 使用 SSH 推送

复制 SSH 链接

自定义远程连接


推送代码

远程库查看

6.4 拉取远程库代码合并本地库
6.4.0 注意事项
push 是将本地库代码推送到远程库,如果本地库代码跟远程库代码版本不一致,push 的操作会被拒绝的。即,要想 push 成功,一定要保证本地库的版本要比远程库的版本高。
因此在动手改本地代码之前,一定要先检查远程库跟本地代码的区别。如果本地的代码版本已经落后,要先 pull 拉取一下远程库的代码,将本地代码更新到最新以后,然后再修改,提交,推送。
6.4.1 拉取远程库

注:pull 是拉敏远端仓库代码到本地,如果远程库代码和本地库代码不一致,会自动合并,如果自动合并失败,还会涉及到手动解决冲突的问题。这里代码进行了自动合并。
6.5 克隆代码到本地

7. 国内代码托管中心-Gitee
7.1 IDEA 集成 Gitee
7.1.1 安装插件

7.1.2 授权登录
这里采用网页跳转授权登录的方式


7.2 集成操作
7.2.1 推送代码到远程库

注:
- 需要自定义远程连接
- 由于 Gitee 是国内平台,建议使用 HTTPS 建立连接登录
7.2.2 拉取远程库代码
在远程库修改代码
1
2
3
4
5
6
7
8
public static void main(String[] args) {
System.out.println("hello,git!");
System.out.println("hello,git2!");
System.out.println("hello,git4!");
System.out.println("push test");
System.out.println("pull test");
System.out.println("gitee test");
}查看本地库代码
1
2
3
4
5
6
7
public static void main(String[] args) {
System.out.println("hello,git!");
System.out.println("hello,git2!");
System.out.println("hello,git4!");
System.out.println("push test");
System.out.println("pull test");
}本地库拉取代码
–>选择 Gitee 库连接

–>拉取后代码
1 | public static void main(String[] args) { |
7.3 导入 GitHub 项目


8. 自建代码托管平台-GitLab
8.1 简介
GitLab 是使用 MIT 许可证的基于网络的 Git 仓库管理工具,使用 Git 作为代码管理工具,在此基础上搭建起来的 web 服务。
8.2 环境准备
8.2.1 服务器准备
克隆虚拟机,修改 IP 地址为 192.168.10.200,主机名为 gitlab-server
配置映射文件(C:\Windows\System32\drivers\etc)

连接 Xshell
8.2.2 安装包准备
- 下载地址:scientific/7/gitlab-ce-15.11.12-ce.0.el7.x86_64.rpm - gitlab/gitlab-ce · packages.gitlab.com
- 完成下载后将 rpm 包上传到服务器 /opt/mocule 目录下
8.2.3 编写安装脚本
编写脚本
1
2
3
4
5
6
7
8
9
10
11
12
13
14
15sudo rpm -ivh /opt/module/gitlab-ce-15.11.12-ce.0.el7.x86_64.rpm
sudo yum install -y curl policycoreutils-python openssh-server cronie
sudo lokkit -s http -s ssh
sudo yum install -y postfix
sudo service postfix start
sudo chkconfig postfix on
curl https://packages.gitlab.com/install/repositories/gitlab/gitlab-ce/script.rpm.sh | sudo bash
sudo EXTERNAL_URL="http://gitlab.example.com" yum -y install gitlab-ce给脚本增加执行权限执行脚本
1
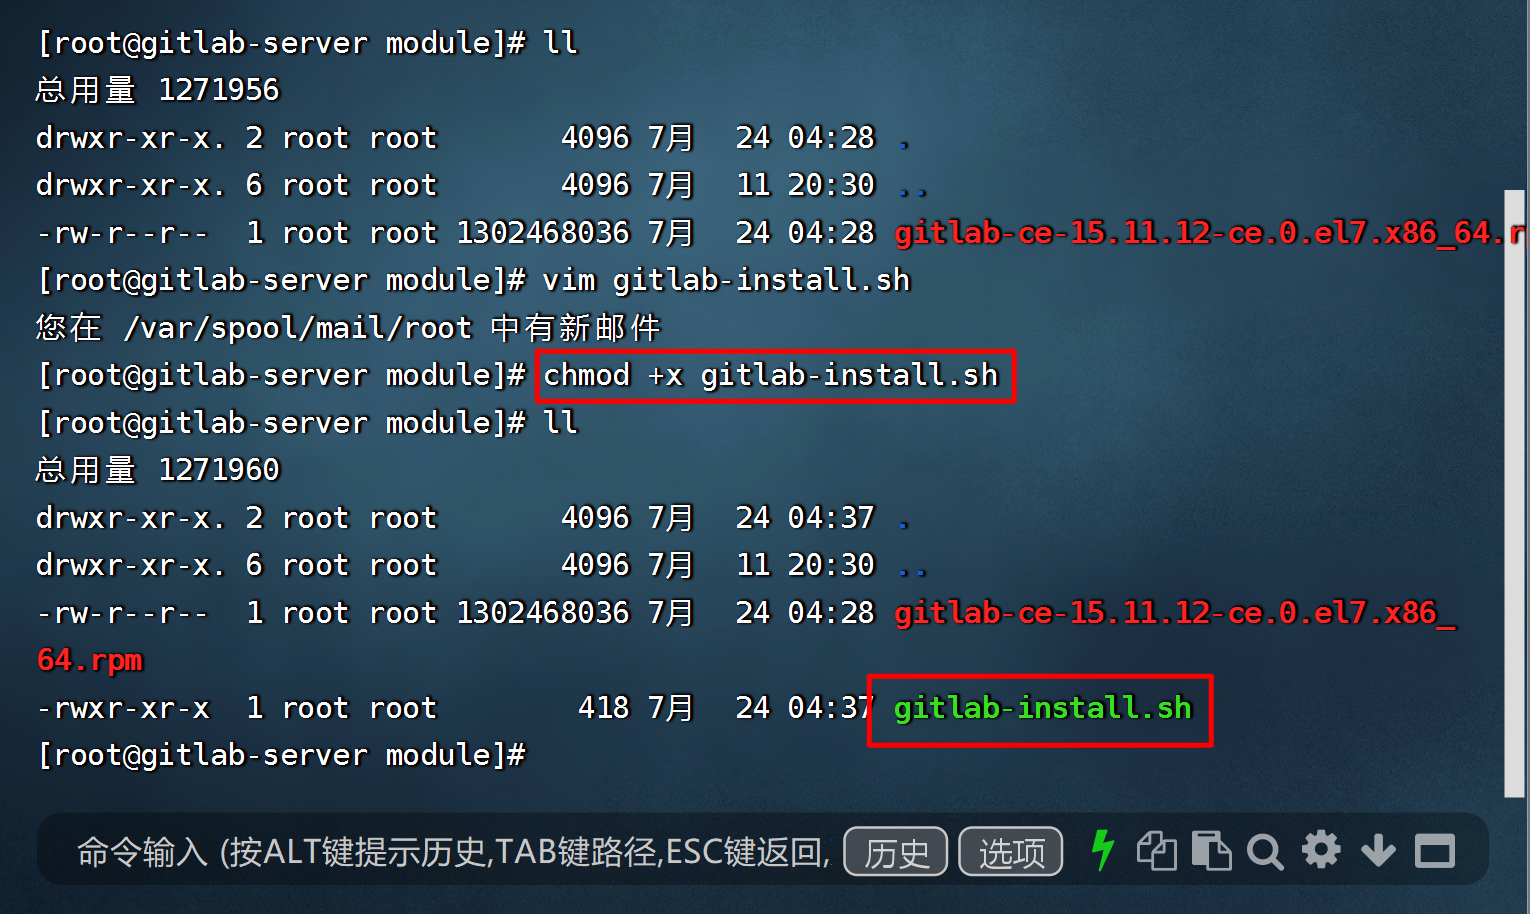
chmod +x gitlab-install.sh

执行脚本
1
./gitlab-install.sh

8.2 初始化、启动与登录
8.2.1 初始化服务
1 | gitlab-ctl reconfigure |

8.2.2 启动服务
1 | gitlab-ctl start |

8.2.3 使用浏览器访问
- 在浏览器直接输入 IP 地址
- 在浏览器输入主机名(需要在配置文件中配置过该用户名)
注:首次登录时密码存储在/etc/gitlab/initial_root_password 目录下

8.3 创建远程库


8.4 IDEA 集成 GitLab
安装 GitLab 插件

登录
注:只要 GitLab 远程库连接定义好以后,对远程库进行 pull 和 clone 的操作和 GitHub、Gitee 一致,不再赘述。
- Title: git
- Author: cccs7
- Created at : 2023-07-29 10:47:33
- Updated at : 2024-09-13 11:07:59
- Link: https://cs7eric.github.io/2023/07/29/Git/
- License: This work is licensed under CC BY-NC-SA 4.0.


